BMW 325i Parts
- Select Vehicle by VIN
- Select Vehicle by Model
For the most accurate results, search by your VIN (Vehicle Identification Number).
Why choose BMWPartsDeal
- Genuine Parts
BMWPartsDeal.com is the best source to buy genuine BMW 325i parts that add a special touch of care to your vehicle. If you're looking to buy new BMW 325i parts and accessories, we feature parts with OEM standards. Our team uses the most trusted components to ensure optimal fit and durability for your vehicle.
- Low Prices
Are you shopping on a budget? To compete in the car market with better quality, better designs, and more cost efficiency we offer parts that meet each specific BMW 325i's specifications at unbeatable prices. BMWPartsDeal.com has the best deals on competitively costly BMW 325i parts so you can restore your car in no time. We offer unbeatable prices without sacrificing the quality.
- Quick Shipping
We too are known for processing orders quickly and efficiently. Shopping on BMWPartsDeal.com is the easiest way to get your genuine BMW 325i parts. All the parts on our website are on hand and ready to ship straight to your door once your order has been made.
Popular Genuine BMW 325i Parts
- Engine Parts View More >
- Front / Rear Axle Parts View More >
- Vehicle Electrical System Parts View More >
- Vehicle Trim Parts View More >
- Engine Electrical System Parts View More >
- Brakes / Pedals / Wheels Parts View More >
- Cooling / Exhaust System Parts View More >
- Steering / Drive Shaft Parts View More >
- Fuel System Parts View More >
- Bodywork Parts View More >
- Heater and Air Conditioning Parts View More >
- Lighting Parts View More >


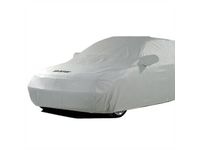
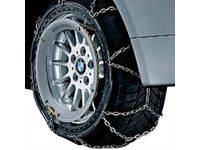
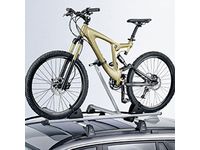
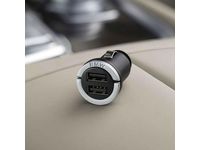
Genuine BMW 325i Accessories


Shop Genuine BMW 325i Parts with BMWPartsDeal.com
The BMW 325i is a model under the 3 Series. In 1985, it saw some upgrades in both the exterior and interior trim. It had a 3.0-liter six-cylinder engine and could produce 168 horsepower at 5,800 rpm and a torque of 222 Nm at 4,300 rpm. Compared with the previous models, the 325i was more powerful and offered a six-speed manual transmission and an automatic one. Drivers could choose at their will. In terms of brakes, it was equipped with standard safety parts. For the front wheels, it used disc brakes, and solid disc brakes for the rear wheels. In 1986, the anti-lock braking system entered into production. Other high-quality parts included dual front airbags, door-mounted side airbags and Dynamic Stability Control. The safety of both drivers and riders was ensured by these functional and reliable parts. As an entry-level luxury vehicle, the 325i offered drivers an impressive driving experience. The seats in the front and the rear were comfortable and supportive, with enough room for them. The control buttons were within the driver's arm, and easy to be figured out. The interior is full of distinctive and high-end materials and parts.
The BMW 325i has been identified as having problems primarily around three areas; the airbag system, electrical system and exterior lighting. In the airbag system, the major problem is in the technology that detects the passenger seat occupant detection mat. The malfunctioning of this system causes deactivation of the front passenger air bag which escalates severe injury possibilities in case of an accident. The electrical concerns are numerous including battery drains, faulty wiring and general failures of electric components among others. These problems have manifested as difficulties in starting the vehicle, unexpected loss of power, and potential fire hazards due to electrical shorts. The BMW 325i's exterior lighting has also presented issues especially with respect to tail light switch and other lighting systems. Complications with headlights, turn signals, and brake lights have been reported, which can significantly impair visibility and signaling, thereby posing safety risks. All these may impair visibility or signaling hence posing danger to road users' safety. Concerns over the safety of occupants and other road users are evident not only with persistent issues in airbags, electrical and lighting systems that impact on the functionality and reliability of BMW 325i.
Choosing OEM products can lead to long-term cost savings on maintenance and repairs since they offer the highest level of durability, thanks to their strict manufacturing processes. Our website is your one-stop destination for OEM BMW 325i parts, like Gearshift / Clutch/ Transmission, all competitively priced to give you the best value for your money. Every genuine BMW 325i part we offer is backed by the assurance of the manufacturer's warranty. Rest assured, we have an easy and straightforward return policy to ensure a hassle-free process for you. Additionally, we pride ourselves on our swift delivery service, ensuring you get your parts in a timely manner. Feel confident shopping with us!
BMW 325i Parts Questions & Answers
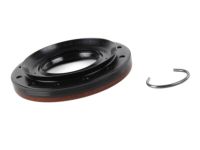
- Q: How to remove and install the differential pinion flange and oil seal?A: This procedure applies to both the front (AWD models) and rear differential. Removal: Remove the driveshaft and the exhaust system. Remove the retaining plate and make alignment marks between the driveshaft flange nut, the differential pinion flange, and pinion. Discard the retaining plate; a new one must be used during installation. Hold the differential pinion flange stationary by bolting a length of metal bar to it. Unscrew the nut, noting the exact number of turns necessary to remove it. Using a suitable puller, draw the differential pinion flange from the pinion and remove the dust cover. If the dust cover shows signs of wear, replace it. Pry the oil seal from the differential case with a screwdriver. Wipe the oil-seal seating surface clean. Installation: Smear a little differential oil on the sealing lip of the new oil seal, then press it squarely into the differential case until it is flush with the outer face. If necessary, tap the seal into position using a metal tube that only bears on its hard outer edge. Install the dust cover and place the differential pinion flange on the pinion, aligning the marks made during removal. Replace the flange nut, screwing it on by the exact number of turns counted during removal, so that all alignment marks align. Caution: Do not overtighten the flange nut. If the nut is overtightened, the collapsible spacer behind the flange will be deformed, requiring its replacement. This is a complex operation that requires the rear differential to be disassembled. Secure the nut in position with the new retaining plate, tapping it squarely into position.
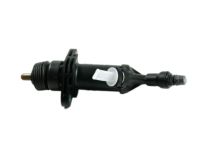
- Q: How to remove and install a clutch release cylinder?A: Do not allow brake fluid to come into contact with the paint as it will damage the finish. Removal: Remove the brake fluid reservoir cap and siphon out enough fluid so that the level is below the level of the reservoir fluid hose connection to the clutch master cylinder. Do not empty the reservoir, as this will draw air into the brake system. To improve access, raise the vehicle and support it securely on jackstands. Release the bolts and remove the splash shield for access to the transmission bellhousing. For metal slave cylinders, place a container beneath the hydraulic pipe connection on the clutch slave cylinder to catch escaping brake fluid. Unscrew the union nut and disconnect the fluid line. Unscrew the securing nuts and withdraw the slave cylinder from the mounting studs on the bellhousing. For plastic slave cylinders, remove the slave cylinder mounting nuts and withdraw the slave cylinder from the mounting studs on the transmission. Pry out the retaining clip and disconnect the fluid line from the cylinder. Inspection: Inspect the slave cylinder for fluid leaks and damage, and replace if necessary. Installation: On models with a plastic slave cylinder, press the piston into the cylinder, then reconnect the fluid pipe. Refill the fluid reservoir, then extend and compress the piston in the cylinder five times while holding the cylinder vertical. The remainder of installation is the reverse of removal, noting the following points: Before installation, clean and lightly grease the end of the slave cylinder pushrod. Tighten the mounting nuts to the specified torque. Top off the fluid level and bleed the clutch hydraulic system.