×
- Hello
- Login or Register
- Quick Links
- Live Chat
- Track Order
- Parts Availability
- RMA
- Help Center
- Contact Us
- Shop for
- BMW Parts
- BMW Accessories
My Garage
My Account
Cart
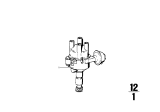
Genuine BMW 2002 Distributor
Ignition Distributor- Select Vehicle by Model
- Select Vehicle by VIN
Select Vehicle by Model
orSeries
Model
Year
Select Vehicle by VIN
For the most accurate results, select vehicle by your VIN (Vehicle Identification Number).
2 Distributors found


BMW 2002 Distributor
If you are looking for OEM BMW 2002 Distributor, we highly recommend to shop with us. Not only do we offer budget friendly prices, but we also provide fast delivery. In addition, we have a hassle-free return policy on all genuine BMW 2002 Distributor that come backed by the manufacturer's warranty.
BMW 2002 Distributor Parts Questions & Experts Answers
- Q: How to dismantle a worn or faulty distributor on BMW 2002?A:Before dismantling a worn or faulty distributor, ensure that the individual components are available as spares. If the unit is severely worn, it may be more cost-effective to obtain a new, reconditioned, or good secondhand assembly. Begin by removing the distributor and then withdraw the cap, rotor arm, and contact breaker set. Extract the circlip from the top of the pivot post where the vacuum capsule link rod is attached. Proceed to remove the vacuum capsule securing screws, tilt the capsule slightly to disengage the link rod from the pivot, and withdraw the capsule. Next, remove the securing screws and lift the contact breaker plate out of the distributor body. Using two screwdrivers as levers, pry the distributor shaft upwards until the spring retaining ring disengages, taking care not to lose the felt lubrication pad or the retaining ring. Secure the distributor in a vice with jaw protectors and drill out the pin that secures the driven gear to the shaft. Extract the distributor shaft along with the centrifugal advance assembly. If the advance assembly needs to be dismantled, mark the components for proper reassembly. If new counter.weight springs are installed, have the advance curve checked by a dealer or auto-electrician after reassembly. Reassembling the distributor is a reversal of the dismantling process, ensuring that the two washers are placed under the baseplate before installing the shaft to the body and that the thrust washer is the one furthest from the baseplate. Use a new drive pin in the shaft and check that the shaft top retaining ring is not distorted; if it is, use a new one. Finally, install the distributor.


