×
- Hello
- Login or Register
- Quick Links
- Live Chat
- Track Order
- Parts Availability
- RMA
- Help Center
- Contact Us
- Shop for
- BMW Parts
- BMW Accessories
My Garage
My Account
Cart
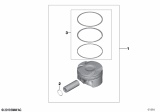
Genuine BMW Z4 Piston
Engine Pistons- Select Vehicle by Model
- Select Vehicle by VIN
Select Vehicle by Model
orSeries
Model
Year
Select Vehicle by VIN
For the most accurate results, select vehicle by your VIN (Vehicle Identification Number).
14 Pistons found


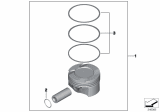
BMW Z4 Piston
Part Number: 11258606459$311.23 MSRP: $403.73You Save: $92.50 (23%)Ships in 1-2 Business Days
BMW Z4 Piston
Part Number: 11255A24670$311.23 MSRP: $403.73You Save: $92.50 (23%)Ships in 1-3 Business Days
BMW Z4 Mahle Piston
Part Number: 11257506224$428.29 MSRP: $502.32You Save: $74.03 (15%)Ships in 1-3 Business DaysBMW Z4 Mahle Piston
Part Number: 11257558528$322.27 MSRP: $383.22You Save: $60.95 (16%)Ships in 1-3 Business Days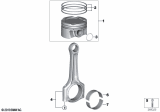
BMW Z4 Piston
Part Number: 11258678934$311.23 MSRP: $403.73You Save: $92.50 (23%)Ships in 1-3 Business DaysBMW Z4 Mahle Piston
Part Number: 11257512526$330.91 MSRP: $388.10You Save: $57.19 (15%)Ships in 1-3 Business DaysBMW Z4 Mahle Piston
Part Number: 11257512528$334.55 MSRP: $392.37You Save: $57.82 (15%)Ships in 1-3 Business DaysBMW Z4 Mahle Piston
Part Number: 11257506222$428.29 MSRP: $502.32You Save: $74.03 (15%)Ships in 1-3 Business DaysBMW Z4 Mahle Piston
Part Number: 11257506223$255.41 MSRP: $358.48You Save: $103.07 (29%)Ships in 1-3 Business DaysBMW Z4 Mahle Piston
Part Number: 11257536373$305.51 MSRP: $396.32You Save: $90.81 (23%)Ships in 1-3 Business DaysBMW Z4 Piston
Part Number: 11257610295$311.23 MSRP: $403.73You Save: $92.50 (23%)Ships in 1-3 Business DaysBMW Z4 Piston
Part Number: 11257577581$311.23 MSRP: $403.73You Save: $92.50 (23%)Ships in 1-3 Business DaysBMW Z4 Piston
Part Number: 11257577582$315.94 MSRP: $409.85You Save: $93.91 (23%)Ships in 1-3 Business Days
BMW Z4 Piston
If you are looking for OEM BMW Z4 Piston, we highly recommend to shop with us. Not only do we offer budget friendly prices, but we also provide fast delivery. In addition, we have a hassle-free return policy on all genuine BMW Z4 Piston that come backed by the manufacturer's warranty.
BMW Z4 Piston Parts Questions & Experts Answers
- Q: What steps must be taken prior to removing the piston and connecting rod assemblies on BMW Z4?A:Before doing away with the piston and connecting rod Assemblies the cylinder head, oil pan, oil pan baffle plate and oil pump has to be dismantled. Carry out a fingernail scrape at about one-quarter inch from the top of each cylinder where there is usually a ridge; where the ridge has resulted from carbon deposits or where worn, it must be smoothed with a ridge reamer so that there is no breaking of the piston. Once the Crankshaft ridges have been phased out you can turn the engine in a way that the crankshaft is on top. Inspection of connecting rod end play is done with feeler gauges with end play being between 0.005 to 0.015 inch as the service limit. On the connecting rods and caps paint or use marker so that they will not be mixed up again, then turn the connecting rod cap bolts sparingly. Lift out the first connecting rod cap and bearing insert without allowing the insert to fall, expel the connecting rod/piston assembly from through the top of the engine. Do the same for all the other cylinders, ensure that all the caps and inserts are replaced to avoid damage. Pistons and connecting rods are also now prepared for inspection and if necessary for overhaul. When fitting new piston rings always measure the end gaps as it is important to know the piston ring side clearance. Sort the piston/connecting rod assemblies on the bench and new ring sets to be fitted together as a set. Fit the top ring into the first cylinder, align it to the walls and use the feeler gauges to check the end gap and correct it if required. The first step being installation of the oil control ring, middle and on top ring with respect to the orientation. Before installation of this product, the cylinder walls must be clean, edges of the cylinder machined and the crank shaft fixed. Remove any dirt on the bearing surfaces and unbending the top and bottom bearing insert with no lubrication used. Place the gaps of the piston rings evenly at an interval of 120 degree, lubricate the piston/rings and then use a compressor for the rings to be fitted. Using Plastigage check connecting rod bearing oil clearance make sure that the size and the condition of the bearing is clean. Remove any excess Plastigage by scraping it off and apply grease or assembly lube then install the rod cap with new bolts and tighten to recommended torque figure. As for all assemblies, be sure you clean and ensure the correct orientation. Last of all, rotate the crankshaft and look for sign of binding and measure the connecting rod end play if the figure is outside of acceptable range a change will be made to it.


