×
- Hello
- Login or Register
- Quick Links
- Live Chat
- Track Order
- Parts Availability
- RMA
- Help Center
- Contact Us
- Shop for
- BMW Parts
- BMW Accessories

My Garage
My Account
Cart
Additional information needed to check if this part fits
1974 BMW 3.0CS
Check another vehicleBMW 11221253633 Flywheel
1969-1978 BMW 11-22-1-253-633
Customer Questions & Expert Answers (2)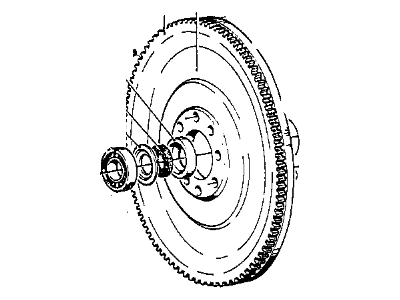
- Part DescriptionFlywheel
- ManufacturerBMW
Additional information needed to check if this part fits
1974 BMW 3.0CS
Check another vehicle$710.17 MSRP: $851.76
You Save: $141.59 (17%)
Ships in 1-3 Business Days
1
- Related Parts
- Specifications
- Q&A
Product Specifications
Brand Genuine BMW Manufacturer Part Number 11221253633 Part Description Flywheel Item Weight 20.70 Pounds Condition New Fitment Type Direct Replacement Manufacturer BMW SKU 11221253633 Warranty This genuine BMW part is guaranteed by BMW's factory warranty. Shipping & Return Shipping Policy Return Policy Warning: California's Proposition 65Customer Questions & Expert Answers
- Q:Does PN fit the VIN? Posted by BMWPartsDeal Specialist
- A:You can Select Your Vehicle to check if 11221253633 fits your vehicle.Posted by BMWPartsDeal Specialist
- Installation and Repair Tips by AI Expert
- Removal: 1. Park on level ground, chock wheels, wear eye protection and gloves, and support the vehicle securely on jack stands or a lift. 2. Disconnect the negative battery cable and keep it isolated while you work. 3. Support the engine if transmission removal or bellhousing separation is required (engine support bar or jack with a wood block under the oil pan). 4. Remove any components that block access to the bellhousing/flywheel area (commonly the driveshaft, exhaust sections, starter, clutch inspection covers, and transmission); procedures vary by design. 5. Before separating transmission, mark relative alignment of the transmission and engine so you can reinstall in the same orientation. 6. Once you can access the flywheel, prevent the crank from turning (use an appropriate holding tool or secure the drivetrain) and loosen the flywheel bolts in an alternating pattern. 7. Remove the flywheel bolts completely, supporting the flywheel as you pull it free-flywheels are heavy and may be tight on the crank flange. 8. Inspect the crank flange, pilot bearing/bushing, flywheel ring gear teeth, and mating surfaces; clean oil/grease from sealing and friction surfaces. 9. Set the removed flywheel on a clean surface and remove or replace related components (pilot bearing, rear main seal) as needed. Installation: 1. Verify the replacement or resurfaced flywheel is correct and free of damage, and clean the crank flange mating surface. 2. If applicable, install or inspect the pilot bearing/bushing and replace if worn. 3. Position the flywheel onto the crank flange using alignment features or marks; ensure it sits flush before inserting bolts. 4. Hand-start all flywheel bolts, then tighten them in an alternating/crisscross pattern in multiple passes to the manufacturer's specified torque (do not guess torque values). 5. Use thread locking compound only if specified by the manufacturer and replace bolts if they are single-use/torque-to-yield. 6. Reinstall the clutch assembly and use a clutch alignment tool when fitting the pressure plate and disc (for manual transmissions). 7. Reinstall the transmission, aligning the previously made marks, and secure all removed components (starter, exhaust, driveshaft, linkage, etc.). 8. Lower/support changes back to normal, reconnect the negative battery cable, and top up any drained fluids. 9. Before fully releasing the vehicle, rotate the crank by hand to confirm smooth operation and proper engagement; then start the engine and listen for abnormal noises and check clutch engagement and driveline operation during a short test drive. 10. Repair tip: replace flywheel bolts and inspect the ring gear and rear main seal while the transmission is out; loose or contaminated surfaces will shorten component life.
- Q:
Why choose BMW Parts Deal
- Dedicated Service
Your complete satisfaction is our #1 goal
- Lowest Prices
Best deals on genuine OE parts from dealerships
- Fast Delivery
Orders are processed and delivered promptly