×
- Hello
- Login or Register
- Quick Links
- Live Chat
- Track Order
- Parts Availability
- RMA
- Help Center
- Contact Us
- Shop for
- BMW Parts
- BMW Accessories

My Garage
My Account
Cart
Genuine 2016 BMW 428i Drive Shaft
Axle Shaft- Select Vehicle by Model
- Select Vehicle by VIN
Select Vehicle by Model
orSeries
Model
Year
Select Vehicle by VIN
For the most accurate results, select vehicle by your VIN (Vehicle Identification Number).
3 Drive Shafts found
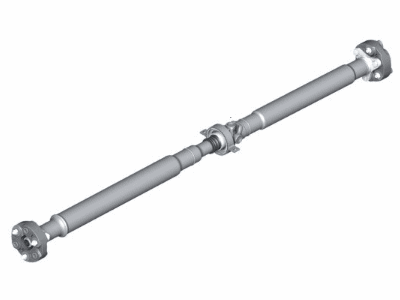
2016 BMW 428i Automatic Gearbox Drive Shaft
Part Number: 26107633661$1358.46 MSRP: $1777.44You Save: $418.98 (24%)Ships in 1-3 Business DaysProduct Specifications- Other Name: Automatic Drive Shaft Gearbox; Drive Shaft, Drive Shaft Assembly
- Item Weight: 27.80 Pounds
- Condition: New
- Fitment Type: Direct Replacement
- SKU: 26107633661
- Warranty: This genuine part is guaranteed by BMW's factory warranty.
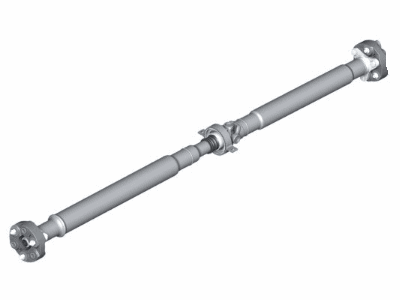
2016 BMW 428i Rear Driver Shaft
Part Number: 26107632653$1358.46 MSRP: $1777.44You Save: $418.98 (24%)Ships in 1-3 Business DaysProduct Specifications- Other Name: Automatic Drive Shaft Gearbox
- Position: Rear Driver Side
- Item Weight: 32.20 Pounds
- Condition: New
- Fitment Type: Direct Replacement
- SKU: 26107632653
- Warranty: This genuine part is guaranteed by BMW's factory warranty.
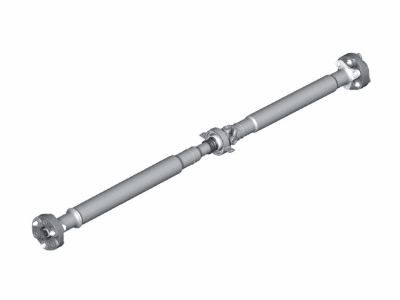
2016 BMW 428i Propshaft / Driveshaft
Part Number: 26107600041$1358.46 MSRP: $1777.44You Save: $418.98 (24%)Ships in 1-3 Business DaysProduct Specifications- Other Name: Manual Drive Shaft Transmiss; Drive Shaft
- Condition: New
- Fitment Type: Direct Replacement
- SKU: 26107600041
- Warranty: This genuine part is guaranteed by BMW's factory warranty.
2016 BMW 428i Drive Shaft
Are you in need of a high-quality yet affordable OEM 2016 BMW 428i Drive Shaft? Look no further. Our website boasts an extensive selection of genuine 2016 BMW 428i Drive Shaft, all priced competitively. Plus, our top-notch customer service and speedy delivery options ensure a seamless shopping experience for you.
2016 BMW 428i Drive Shaft Parts Questions & Experts Answers
- Q: How should the Drive Shaft, centering sleeve, and insert nut be inspected, prepared, and installed N20 and N26 engines on 2016 BMW 428i?A: Prior to installation, inspect the centering dowel on the transmission/transfer case output flange and the centering sleeve inside the driveshaft flex-disc, and replace damaged components (front centering sleeve per repair group instructions). When installing the centering sleeve over the dowel, apply a thin coat of molybdenum disulfide grease (Molykote Longterm 2 Plus or equivalent). Clean the insert collar and splined teeth on the pinion and fill the collar with a thin coat of the same grease; clean the external threads and internal splined hub teeth on the driveshaft flange and coat the splines with the same grease. Using new parts, place the insert nut with seal in the collar of the flange nut and install the retaining cover. Caution: Attach the driveshaft to the transmission/transfer case, to the rear differential, and install the center mount in that order; tighten nuts in the following order: insert nut to driveshaft, flex-disc to transmission/transfer case, then center mount to chassis. Align matchmarks and attach the front flex-disc to the transmission/transfer case output flange using new fasteners, holding the bolts stationary while tightening nuts to avoid damaging the flex-disc rubber. Bend the driveshaft slightly at the center universal joint to aid installation to the rear differential, slide the driveshaft fully onto the insert nut and secure finger tight, brace the driveshaft at the center universal joint with a pry bar and tighten the insert nut to final torque within five minutes; do not use the differential flange nut to counterhold the driveshaft as the rear differential may be damaged. Reinstall the center bearing support, install heat shields and the exhaust system, then road test the vehicle to check for noise or vibration.
Related 2016 BMW 428i Parts
 2016 BMW 428i Wheel Bearing
 2016 BMW 428i Transmission Assembly
 2016 BMW 428i Flywheel
 2016 BMW 428i Axle Shaft
 2016 BMW 428i Cruise Control Switch
 2016 BMW 428i Clutch Disc
 2016 BMW 428i Clutch Master Cylinder