×
- Hello
- Login or Register
- Quick Links
- Live Chat
- Track Order
- Parts Availability
- RMA
- Help Center
- Contact Us
- Shop for
- BMW Parts
- BMW Accessories
My Garage
My Account
Cart
Genuine BMW Z4 Batteries
Car Battery- Select Vehicle by Model
- Select Vehicle by VIN
Select Vehicle by Model
orSeries
Model
Year
Select Vehicle by VIN
For the most accurate results, select vehicle by your VIN (Vehicle Identification Number).
18 Batteries found


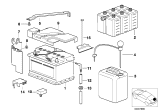
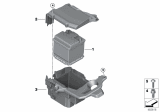
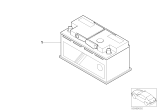
BMW Z4 BATTERY
Part Number: 84106833994$75.75 MSRP: $101.98You Save: $26.23 (26%)Ships in 1-3 Business Days
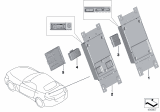
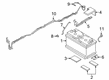
BMW Z4 LITHIUM DUAL STORAGE BATTERY
Part Number: 61215B3F325$695.62 MSRP: $854.27You Save: $158.65 (19%)


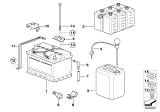
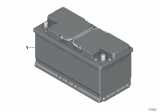
BMW Z4 Battery, Manuf.: Exide (Warranty Only)
Part Number: 61217586961$139.89 MSRP: $158.33You Save: $18.44 (12%)

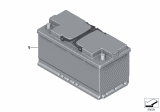
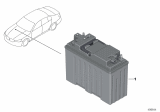
BMW Z4 Original Bmw Agm-Batterie 90Ah
Part Number: 61216924023$254.70 MSRP: $329.91You Save: $75.21 (23%)
BMW Z4 Battery, Manuf.: Douglas (Warranty Only)
Part Number: 61218381738$103.15 MSRP: $123.00You Save: $19.85 (17%)BMW Z4 Battery, Manuf.: Douglas (Warranty Only)
Part Number: 61218381749$114.05 MSRP: $136.00You Save: $21.95 (17%)
BMW Z4 Battery, Manuf.: Exide (Warranty Only)
Part Number: 61217591080$166.53 MSRP: $207.90You Save: $41.37 (20%)
BMW Z4 Battery, Manuf.: Exide (Warranty Only)
Part Number: 61217598775$168.40 MSRP: $190.60You Save: $22.20 (12%)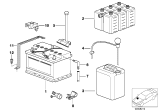
BMW Z4 Battery, Manuf.: Exide (Warranty Only)
Part Number: 61217586960$174.96 MSRP: $218.41You Save: $43.45 (20%)
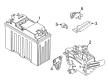
BMW Z4 12-V LITHIUM DUAL STORAGE SY
Part Number: 61219857516$646.20 MSRP: $754.09You Save: $107.89 (15%)
BMW Z4 Batteries
If you are looking for OEM BMW Z4 Batteries, we highly recommend to shop with us. Not only do we offer budget friendly prices, but we also provide fast delivery. In addition, we have a hassle-free return policy on all genuine BMW Z4 Batteries that come backed by the manufacturer's warranty.
BMW Z4 Batteries Parts Questions & Experts Answers
- Q: How to accurately measure the voltage of the batteries on BMW Z4?A:To measure the battery voltage accurately, the top charge must be removed. Achieving this involves switching on the higher lights for a period of ten seconds and then turning them off to allow the vehicle stay for about two minutes. Battery check begins by taking off the battery cover and unplugging both the negative and positive Battery Cables. The indicator eye at the top of the battery should be visually examined; it has to be black meaning that it should be charged if yellow or replaced in case of defects. Open circuit voltage is measured using a digital voltmeter, which should give about 12.6 volts for a fully charged battery. Charge your battery first if it is less than this value before you proceed with other steps. A load tester is next used to carry out a load test on your battery. Connect this device to your terminals, apply its load within fifteen seconds without letting your cells' voltage drop below 9.6 volts. When it is weak or defective, an indication will appear in a load tester's display window. During replacement of one's battery, check with dealer parts department or auto parts store that sells batteries so as to get accurate choice of battery required in such cases. Remove relevant trim panels and also loosen up the positive plus negative cables connected to my battery Remove relevant trim panels and also loosen up the positive plus negative cables connected to my batter Ensure that there is no corrosion beneath your cells after lifting them out carefully as they are heavy Avoid being careful when lifting out my cell due to its weight; look at underneath if corroded clean It should first connect new batteries and lastly attach negatives.
")
Related BMW Z4 Parts
 BMW Z4 Battery Cable
 BMW Z4 Fuse Box
 BMW Z4 Battery Fuse
 BMW Z4 Battery Vent Tube
 BMW Z4 Engine Mount Bracket
 BMW Z4 Automatic Transmission Shift Levers
 BMW Z4 Automatic Transmission Shift Position Sensor Switch
 BMW Z4 Automatic Transmission Shifter
 BMW Z4 Back Glass Lift Support
 BMW Z4 Back Up Light
 BMW Z4 Back Up Light Switch
Browse by Year
2025 Batteries 2024 Batteries 2023 Batteries 2022 Batteries 2021 Batteries 2020 Batteries 2019 Batteries 2016 Batteries 2015 Batteries 2014 Batteries 2013 Batteries 2012 Batteries 2011 Batteries 2010 Batteries 2009 Batteries 2008 Batteries 2007 Batteries 2006 Batteries 2005 Batteries 2004 Batteries 2003 Batteries