My Garage
Cart
Make sure this part fits

BMW 11142249532 Shaft Seal

1991-2008 BMW 11-14-2-249-532

Customer Questions & Expert Answers (10)
11142249532 BMW Shaft Seal Product Photo 1 of 4
  • Part Description
    Shaft seal
  • Manufacturer
    BMW
Make sure this part fits
$91.31 MSRP: $97.36
You Save: $6.05 (7%)
Ships in 1-3 Business Days
1
ADD TO CART
  • Related Parts
  • Product Specifications
  • Vehicle Fitment
  • Customer Questions & Expert Answers
  • Product Specifications

    BrandGenuine BMW
    Manufacturer Part Number11142249532
    Part DescriptionShaft seal
    Item Weight0.60 Pounds
    ConditionNew
    Fitment TypeDirect Replacement
    ManufacturerBMW
    SKU11142249532
    WarrantyThis genuine BMW part is guaranteed by BMW's factory warranty.
    Shipping & ReturnShipping Policy Return Policy
    Warning: California's Proposition 65
  • Vehicle Fitment

    Year Make Model Submodel
    2001-2005, 1993-1995 BMW 320iSedan(E36), Sedan(E46)
    2000 BMW 323CiConvertible(E46), Coupe(E46)
    1998-2000 BMW 323iConvertible(E36), Sedan(E46), Wagon(E46)
    1998-1999 BMW 323isCoupe(E36)
    2001-2006 BMW 325CiConvertible(E46), Coupe M54 Engine(E46), Coupe M56 Engine(E46), Coupe(E46)
    2001-2005, 1992-1995 BMW 325iConvertible(E36), Sedan M54 Engine(E46), Sedan M56 Engine(E46), Sedan(E36), Sedan(E46), Wagon M54 Engine(E46), Wagon M56 Engine(E46), Wagon(E46)
    1991-1995 BMW 325isCoupe(E36)
    2001-2005 BMW 325xiSedan(E46), Wagon(E46)
    2000 BMW 328CiCoupe(E46)
    1996-2000 BMW 328iConvertible(E36), Sedan(E36), Sedan(E46)
    View More
  • Customer Questions & Expert Answers

    Q:
    Does PN fit the VIN? Posted by BMWPartsDeal Specialist
    A:
    You can Select Your Vehicle to check if 11142249532 fits your vehicle.
    Posted by BMWPartsDeal Specialist
    Q:
    How to replace the front and rear crankshaft seals on a BMW Z4? Posted by Customer
    A:
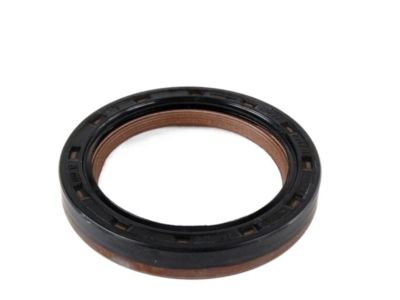
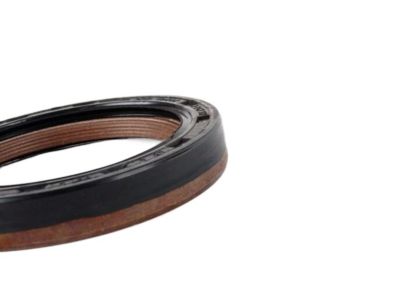
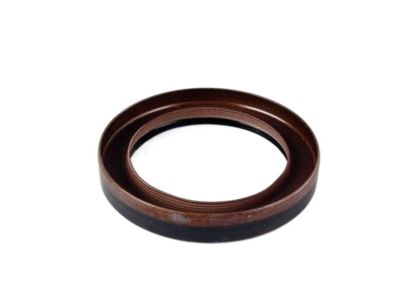
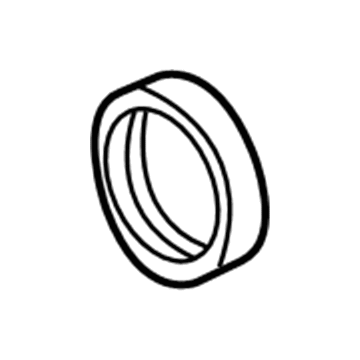
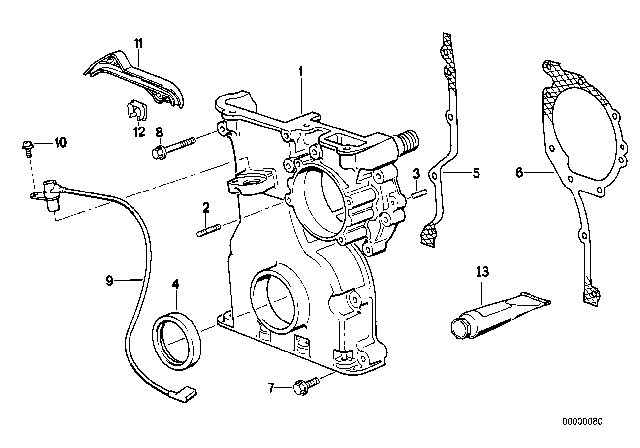
    To replace the crankshaft front oil seal, follow the timing chain cover removal and installation procedure. For the crankshaft rear oil seal, begin by removing the flywheel/driveplate. At the bottom of the oil seal housing, unscrew the bolts securing the rear of the oil pan to the housing, then unscrew the bolts securing the oil seal housing to the engine block. If the housing is stuck to the oil pan gasket, use a sharp, thin blade to separate them without damaging the gasket. Withdraw the housing from the engine block, gently tapping it with a soft-faced mallet if necessary, and remove the gasket. Clean all traces of old gasket and sealant from the mating faces, taking care not to damage the oil pan gasket; if it is damaged, install a new one. Support the oil seal housing on blocks of wood and drive out the seal from the rear using a hammer and drift, then clean the seal mating surfaces. Install the new seal using the seal protector, ensuring not to touch the sealing lip, and drive it into position with a seal driver. Ensure the locating dowels are in place, then position a new oil seal housing gasket over them. Carefully install the housing to the engine block, sliding the oil seal protector over the crankshaft flange, and push the seal and housing into place without damaging the oil seal lips. Reinstall and lightly tighten the housing-to-engine block and oil pan-to-housing bolts, then tighten them to the specified torque. Finally, reinstall the flywheel/driveplate. For camshaft oil seals, note that in a timing chain engine, sealing is provided by the valve cover gasket and timing chain cover gaskets.
    Posted by BMWPartsDeal Specialist
    Q:
    How to remove and install the front crankshaft seal on BMW X3? Posted by Customer
    A:
    When replacing the crankshaft seal, it is important to fill the grooves and crankcase seams with special Loctite sealant to prevent oil leaks. To begin, raise the vehicle and remove the splash shield underneath the engine. Next, remove the engine accessory belt and the vibration damper (front pulley), taking care not to remove the vibration damper hub bolt to avoid valve damage. Use BMW special tool 11 9 221 to push the crankshaft seal inward, loosening it for removal. Then, screw BMW special tool 11 O 371 into the seal and rotate it clockwise to pull out the seal. Clean the crankshaft seal seating surface and degrease the area around the crankcase seam. Lightly oil the sealing surface on the vibration damper hub. Attach BM special tool 119 232 to the hub and place the crankshaft seal and installation sleeve over the tool and crankcase opening. Coat the seal grooves with Loctite 171000 primer and ensure they center on the crankcase seam. Use BMW special tools 11 9 231 and 11 9 233 to press in the seal. Coat the seal grooves and crankcase seams with Loctite 171000 primer and fill them with Loctite 128357 sealant using an injector kit. Finally, coat the sealed areas with Loctite 171000 primer and reinstall the crankshaft vibration damper. The remaining assembly is the reverse of the disassembly process.
    Posted by BMWPartsDeal Specialist
    Q:
    How to replace the front crankshaft seal on BMW X3? Posted by Customer
    A:
    With the engine fully cooled off, remove the electric cooling fan and cowl, engine accessory belts and crankshaft vibration damper and pulley. Be sure to mark belts with direction of rotation. Install cap (BMW special tool 11 2 383) on the end of the crankshaft. Install seal guide (BMW special tool 11 2 385) over the end of the crankshaft. Be sure to align the groove with the keyway on the crankshaft (arrow). Install oil seal puller (BMW special tool 11 2 380) and screw in the body of the puller until it contacts the seal. Tighten the bolt in the center of the tool to draw the seal out of the cover. Coat the new seal with oil and position it in the timing chain cover. Use BMW special tool 11 3 280 and the crankshaft center bolt to draw the seal in flush with the timing case cover. Reinstall the crankshaft vibration damper and pulley. The remainder of the installation is the reverse of removal, noting the following: Install engine accessory belts. Install the cooling fan.
    Posted by BMWPartsDeal Specialist
    Q:
    What is the next step after removing the components for the 2005 BMW X5? Posted by Customer
    A:
    Install the crankshaft protector cap using the special tool on the end of the crankshaft.
    Posted by BMWPartsDeal Specialist
    See expert answers on similar Crankshaft Seal
    Q:
    What is the first step in replacing the crankshaft rear main seal for the 2006 BMW X5? Posted by Customer
    A:
    The first step is to remove the transmission.
    Posted by BMWPartsDeal Specialist
    See expert answers on similar Crankshaft Seal
    Q:
    What should be inspected before installing the new oil seal for the 1997 BMW Z3? Posted by Customer
    A:
    Before installing the new oil seal, you should inspect the outer edge of the seal housing for nicks or sharp edges.
    Posted by BMWPartsDeal Specialist
    See expert answers on similar Crankshaft Seal
    Q:
    What should be done with the new seal before installation for the 2006 BMW X5? Posted by Customer
    A:
    Coat the new seal with oil.
    Posted by BMWPartsDeal Specialist
    See expert answers on similar Crankshaft Seal
    Q:
    How is the new seal installed for the 2006 BMW X3? Posted by Customer
    A:
    The new seal and installation sleeve are placed against the crankcase opening, ensuring not to kink or damage the sealing lip. BMW special tools are used to fit the crankshaft flange, and a spacer ring is placed over the seal. The seal is pressed in using BMW special tools, and then the special tools and spacer ring are removed.
    Posted by BMWPartsDeal Specialist
    See expert answers on similar Crankshaft Seal
    Q:
    What preparation is needed for the sealing surfaces for the 2001 BMW X5? Posted by Customer
    A:
    Apply a thin coat of 3-Bond® 1209 or equivalent sealant to the oil pan gasket sealing surfaces, and lubricate the crankshaft and seal contact surfaces.
    Posted by BMWPartsDeal Specialist
    See expert answers on similar Crankshaft Seal
    If you have any questions about this product, please don't hesitate to ask us. We will be happy to help you!

Genuine BMW Part 11142249532, the Right Choice

To guarantee reliability, choose BMW part # 11142249532 Shaft Seal. It is also referred to as Crankshaft Seal. This genuine part is built directly by BMW under very rigorous testing and developed using reliable materials to tolerate years of heavy use and present long-lasting performance. This part fits 1996-2000 328i, 2001-2006 M3, 2004-2006 X3, 2001-2006 X5.

BMWPartsDeal.com is a leading supplier of genuine BMW parts and accessories such as 11-14-2-249-532 Shaft Seal. Looking to get brand-new OEM BMW parts? Our prices are highly competitive, and we supply a wide range of quality genuine parts. Moreover, all the parts are accompanied by a manufacturer's warranty and a no-hassle return policy to support your convenience.

Why choose BMW Parts Deal

  • Dedicated Service

    Your complete satisfaction is our #1 goal

  • Lowest Prices

    Best deals on genuine OE parts from dealerships

  • Fast Delivery

    Orders are processed and delivered promptly