×
- Hello
- Login or Register
- Quick Links
- Live Chat
- Track Order
- Parts Availability
- RMA
- Help Center
- Contact Us
- Shop for
- BMW Parts
- BMW Accessories
My Garage
My Account
Cart
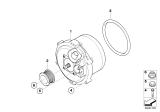
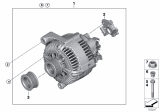
Genuine BMW X5 Alternator
Generator- Select Vehicle by Model
- Select Vehicle by VIN
Select Vehicle by Model
orSeries
Model
Year
Select Vehicle by VIN
For the most accurate results, select vehicle by your VIN (Vehicle Identification Number).
33 Alternators found


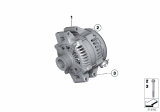
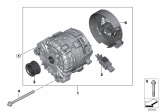
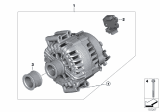
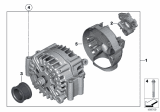
BMW X5 Alternator
Part Number: 12317591529$891.38 MSRP: $1312.41You Save: $421.03 (33%)Ships in 1-3 Business Days
BMW X5 Alternator
Part Number: 12318634167$1041.74 MSRP: $1551.03You Save: $509.29 (33%)Ships in 1-3 Business DaysBMW X5 Alternator
Part Number: 12317616119$885.92 MSRP: $1312.41You Save: $426.49 (33%)Ships in 1-3 Business Days
BMW X5 RP ALTERNATOR
Part Number: 12317560988$971.50 MSRP: $1431.71You Save: $460.21 (33%)Ships in 1-2 Business DaysBMW X5 Alternator
Part Number: 12318634166$1041.74 MSRP: $1551.03You Save: $509.29 (33%)Ships in 1-3 Business Days
BMW X5 Alternator
Part Number: 12317603779$966.67 MSRP: $1431.71You Save: $465.04 (33%)Ships in 1-3 Business Days
BMW X5 Exchange Alternator
Part Number: 12317616126$923.37 MSRP: $1374.79You Save: $451.42 (33%)Ships in 1-3 Business Days
BMW X5 Exchange Alternator
Part Number: 12317560989$971.50 MSRP: $1431.71You Save: $460.21 (33%)Ships in 1-3 Business DaysBMW X5 Exchange Alternator
Part Number: 12317603782$966.67 MSRP: $1431.71You Save: $465.04 (33%)Ships in 1-3 Business Days
BMW X5 Alternator
Part Number: 12317852129$1155.82 MSRP: $1706.14You Save: $550.32 (33%)Ships in 1-3 Business Days
BMW X5 Exchange Alternator
Part Number: 12317591530$798.92 MSRP: $1176.00You Save: $377.08 (33%)Ships in 1-3 Business DaysBMW X5 Exchange Alternator
Part Number: 12317616121$885.92 MSRP: $1312.41You Save: $426.49 (33%)Ships in 1-3 Business DaysBMW X5 Alternator
Part Number: 12318611280$1046.82 MSRP: $1551.03You Save: $504.21 (33%)Ships in 1-3 Business Days
BMW X5 Exchange Alternator, Water-Cooled
Part Number: 12317508054$1008.83 MSRP: $1172.08You Save: $163.25 (14%)Ships in 1-3 Business Days
BMW X5 Exchange Alternator
Part Number: 12317561004$801.34 MSRP: $1193.10You Save: $391.76 (33%)Ships in 1-3 Business DaysBMW X5 Exchange Alternator
Part Number: 12317804266$817.35 MSRP: $1216.95You Save: $399.60 (33%)Ships in 1-3 Business Days
BMW X5 Alternator
Part Number: 12317560985$805.78 MSRP: $1193.10You Save: $387.32 (33%)Ships in 1-3 Business Days
BMW X5 EXCH. GENERATOR
Part Number: 12318689832$1041.74 MSRP: $1551.03You Save: $509.29 (33%)Ships in 1-3 Business DaysBMW X5 Alternator
Part Number: 12318654280$1041.74 MSRP: $1551.03You Save: $509.29 (33%)Ships in 1-3 Business Days
BMW X5 RP ALTERNATOR
Part Number: 12317533469$966.67 MSRP: $1431.71You Save: $465.04 (33%)Ships in 1-3 Business Days
| Page 1 of 2 |Next >
1-20 of 33 Results
BMW X5 Alternator
One among the important components in the BMW X5 is the BMW Alternator, which is precisely the built-in charger for the automobiles battery in addition in charging all the electrical parts in the Alternator during its operation. Sited anterior to the engine, the Alternator produces electricity from mechanical energy by sticking to faraday's law which creates an electromotive force that generates the AC voltage in the stator coils. This functionality is very important especially in recharging the battery as well as to ensure a efficient electrical charging of the BMW X5. Suits the early E53 X5 model, the second gen X5 models, as well the the 4th generation X5 model, Alternator ensures that all electrical components function as required to optimize and extend safety. However, the Alternator is market distinct because of the capacity to manage additional electrical loads, especially on models possessing additional components. They help to avoid cases where the charging is done either in excess or inadequately which is very essential for the proper functioning of the vehicle. Moreover, the high-output Alternators for the particular models also describe the company's innovation and quality. The BMW Alternator stands for quality as the design and implemented functions illustrate the BMW's commitment to provide solid and powerful car for driving with the BMW X5 proving to be a leader in SUV segment.
If you are looking for OEM BMW X5 Alternator, we highly recommend to shop with us. Not only do we offer budget friendly prices, but we also provide fast delivery. In addition, we have a hassle-free return policy on all genuine BMW X5 Alternator that come backed by the manufacturer's warranty.
BMW X5 Alternator Parts Questions & Experts Answers
- Q: What precautions should be taken when testing the charging system components and how should battery voltage be checked at the alternator on BMW X5?A:Do not disconnect the battery while the engine is running, as this may cause damage to the alternator or engine electronic systems. Only use a digital multimeter when testing charging system components. With the ignition ON, check that the battery warning light illuminates. If the warning light does not come ON, repair any bulb or wiring faults before proceeding with the charging system check. To check for battery voltage at alternator terminal 30 (B+), pull back the rubber insulating cover at terminal 30 at the rear of the alternator, then connect a voltmeter between terminal 30 and ground to check for battery voltage; if voltage is absent, inspect the wiring for faults. Battery voltage can also be verified between the B+ terminal on the left cylinder head and ground. Disconnect the harness connector from the alternator, turn the ignition ON, and check for battery voltage between terminal 15 and ground; if voltage is not present, examine the wiring and fuses for faults. Reconnect the connector to the alternator and locate the blue wire from terminal 61E of the alternator connector, carefully connecting the positive test lead to the wire using a piercing test lead end. With the ignition ON, check for voltage, which should be less than 1.5 v, and the charge indicator lamp should light. After ensuring all test equipment and tools are clear, start the engine; voltage should increase to 8.0 v or higher, and the charge indicator light should go out. If voltage does not increase and the system is not charging, the fault lies within the alternator. If voltage does not increase but the system is charging, interrogate the system for faults using an appropriate BMW scan tool and reset the fault memory. If a load tester is unavailable, a quick alternator output test can be performed by running the engine at about 2000 rpm and turning on electrical loads such as fans, lights, rear window defroster, and wipers; with all accessories on, battery voltage should remain above 12.6 v.

Related BMW X5 Parts


Browse by Year
2023 Alternator 2022 Alternator 2021 Alternator 2020 Alternator 2019 Alternator 2018 Alternator 2017 Alternator 2016 Alternator 2015 Alternator 2014 Alternator 2013 Alternator 2012 Alternator 2011 Alternator 2010 Alternator 2009 Alternator 2008 Alternator 2007 Alternator 2006 Alternator 2005 Alternator 2004 Alternator 2003 Alternator 2002 Alternator 2001 Alternator 2000 Alternator