- Hello
- Login or Register
- Quick Links
- Live Chat
- Track Order
- Parts Availability
- RMA
- Help Center
- Contact Us
- Shop for
- BMW Parts
- BMW Accessories

Why choose BMWPartsDeal
- Genuine Parts
BMWPartsDeal.com is the best source to buy genuine BMW Z4 parts that add a special touch of care to your vehicle. If you're looking to buy new BMW Z4 parts and accessories, we feature parts with OEM standards. Our team uses the most trusted components to ensure optimal fit and durability for your vehicle.
- Low Prices
Are you shopping on a budget? To compete in the car market with better quality, better designs, and more cost efficiency we offer parts that meet each specific BMW Z4's specifications at unbeatable prices. BMWPartsDeal.com has the best deals on competitively costly BMW Z4 parts so you can restore your car in no time. We offer unbeatable prices without sacrificing the quality.
- Quick Shipping
We too are known for processing orders quickly and efficiently. Shopping on BMWPartsDeal.com is the easiest way to get your genuine BMW Z4 parts. All the parts on our website are on hand and ready to ship straight to your door once your order has been made.
Popular Genuine BMW Z4 Parts
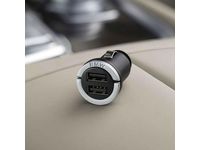
- Engine Parts View More >
- Front / Rear Axle Parts View More >
- Vehicle Electrical System Parts View More >
- Vehicle Trim Parts View More >
- Engine Electrical System Parts View More >
- Brakes / Pedals / Wheels Parts View More >
- Cooling / Exhaust System Parts View More >
- Steering / Drive Shaft Parts View More >
- Fuel System Parts View More >
- Bodywork Parts View More >
- Heater and Air Conditioning Parts View More >
- Lighting Parts View More >


Shop Genuine BMW Z4 Parts with BMWPartsDeal.com
The first generation of the BMW Z4 was known as the E85 and the E86 coupe. The 2003 model came with parts like a 2.5-liter engine that provided 184 hp and a 3.0-liter motor that made 225 hp, and you could get it with a five-speed manual, a five-speed automatic, or a five-speed SMG transmission. The interior parts of the two-seater are pleasant, with electrically adjustable mirrors and a ten-speaker stereo system that comes as standard. In 2006, a coupe with a fixed roof joined the BMW Z4 and a powerful version of the Z4 M was released. The 330-horsepower Z4 M is powered by the same 3.2-liter six-cylinder engine found in the BMW M3, with only minor styling changes. There are two versions of the car: the sDrive30i and the sDrive35i. The inline six-cylinder in the sDrive30i makes 255 hp, while the 3.0L twin-turbocharged six-cylinder in the sDrive35i makes 300 hp. Driving Dynamics Control, which lets the driver choose between Normal, Sport, and Sport+ modes for the car's performance, adaptive brake lights, and a lightweight two-piece aluminum axle are all standard parts. The new-generation BMW Z4 was available in 2018, and, compared to the previous version, it is larger on the outside but has parts like a shorter wheelbase. The wheelbase is now 2.47 m longer, which makes the car more maneuverable in curves and the weight ratio is 50:50. In addition to the digital dashboard and state-of-the-art infotainment system, the Z4 can be unlocked and locked via smartphone.
The BMW Z4, produced between 2002-2008, has been characterized by its rapid convertible functionality and spacious trunk, yet it has encountered issues related to Convertible Top Malfunction and Steering Drifts. A prevalent cause for the convertible top malfunction is water damage to the hydraulic pump, often resulting from obstructed drains, highlighting the importance of regular maintenance and drain cleaning. Relocating the pump has been contemplated but is met with reservations due to potential subsequent issues. Further complications include instances of the roof stopping mid-closure in 2006 and hydraulic fluid leakages, leading to potential solutions like hydraulic motor replacements and Microswitch inspections. Concurrently, Z4 models spanning 2003-2009 have experienced steering drift complications predominantly due to electric power steering column failures. This problem manifests as the steering becoming notably stiff and sometimes activating dashboard warnings. Reducing aggressive driving was a suggested mitigation strategy but didn't consistently solve the problem. Repairs vary in cost, from DIY approaches at $300 to expert repairs reaching $1,900. The 2007 Z4 E85 model presented unclear steering at speeds around 70-75 mph, often attributed to wear and tear, complicating the steering dilemma. Additionally, debates emerged regarding the influence of changing tire brands. Furthermore, 2006 and 2007 models demonstrated increased steering resistance, stirring discussions on whether the origin was tires or the electric power steering system. Meanwhile, 2003 and 2004 models also displayed steering issues in elevated temperatures.
OEM parts are made and tested to BMW's official factory standards. They go through the strict manufacturing processes to maximize perfections. Looking for affordable OEM BMW Z4 parts, including Gearshift / Clutch / Transmission? Explore our comprehensive catalogue of genuine BMW Z4 parts. All our parts are covered by the manufacturer's warranty. Plus, our straightforward return policy and speedy delivery service ensure an unparalleled shopping experience. We look forward to your visit!
BMW Z4 Parts Questions & Answers
- Q: What are the steps required for installing front lower control arm on BMW Z4?A: New lower control arm front ball joint nuts are needed for assembly. To start with, one should place a block on the rear wheels, engage the parking brake, lift the front part of the car and support it by means of jackstands and finally remove the correct front wheel. Then, unscrew the splash shield to undo if from the screws, and finally unscrew the bolts to undo the reinforcement cross brace/plate located below the vehicle. For the models with suspension ride height sensors, now, the retaining nut needs to be unscrewed and the sensor link bracket needs to be detached from the lower arm. Loosen of the lower arm balljoint nut and free the arm from the steering knuckle by using a universal balljoint separator, while holding of the balljoint with the Allen key before nut removal. Undo the two bolts that fix the lower arm rear mounting bracket to the chassis, then unscrew the nut in the inner balljoint of the arm and raise the lower arm assembly out from under the car: the balljoint is likely to be tightly pressed into the crossmember and may need to be tapped out. Wash the lower arm and the adjacent zone and inspect the area for cracks, distortions, or other signs of wear, particularly in the mounting bushings and ball joint; if necessary, you should take the lower arm to a BMW centre or to a garage equipped for replacing the bushes as they should be pressed in. For installation, first, make certain that the balljoint studs and mounting holes are clean and dry, then align the lower arm, by engaging the inner mounting stud to the crossmember; then the balljoint stud with the steering knuckle while using the jack to pull the inner balljoint stud into place. Thread on a new nut to the inner balljoint stud and tighten it to the specified torque; then do the same to a new outer balljoint stud. Replace the bolts of the lower arm rear mounting bracket and torque it, in case you have models with the suspension ride height sensors then replace the sensor link bracket and tighten the nut. Last of all, replace the reinforcement cross brace or plate and torque the bolts, replace the engine splash shield, fit the wheel, lower the car and torque the bolt of the wheel.
- Q: What precautions and steps should be taken before replacing front brake discs and pads on BMW Z4?A: It is recommended always to have in mind some preventive measures and prohibitions before beginning to work. If one brake disc is worn out, the other one should be changed at the same time as new brake pads should be also fitted for an equal and proper operation of the brakes. First, engage the parking brake and then safely lift the front part of the car by installation of interstate jack stands, then before continuing remove the correct front wheel. If need be, that is, if better access to the rotating brake disc is required, the brake pads can be removed by pulling them out from the brake disc. Light scoring is expected, but if the surface gets heavy scores or cracks then it has to be replaced. Rust and brake dust often develop a lip around the circumference of the disc and, while this can be scraped off, if the lip is due to excessive wear, use a micrometer to measure the thickness at several points along the disc's edge. If the disc has worn to the specified minimum thickness or less, it is required that it should be changed. Warping can also be detected by run out, that is by checking on the dial gauge or blades of feeler and if it is high then the discs have to be replaced and it will be advisable to check on the hub bearing. Check the disc for cracks and other wearing out signs and replace with if it is worn out. For removal, you will have to remove the bolts that hold the brake caliper mounting bracket to the steering knuckle then push the caliper assembly off the disc and hang it on the front suspension coil spring so that the hydraulic brake hose is not under strain. Undo and withdraw the screw that bolts the brake disc to the hub and take off the disc and if you find that the rear face of the disc is tight tap it gently. Removal is done in the reverse, with especial attention paid to the state of the mating surfaces; the disc is placed onto the hub and the retaining screw intentionally tightened to the recommended torque. If a new disc is installed, remove all preservative coating before fitting the caliper and the last preceding must fit over the disc with pads above and below. Secure the caliper mounting bolts to a torque stated for the model, and then fit the wheel, drop the automobile and finally fasten the wheel bolts to the required torque. Last, gradually press the brake pedal till it attains its normal force, this is through successive depressing of the same.
- Q: How to remove the instrument cluster and center console on BMW Z4?A: To remove the center console, one has to pull the gear shift knob up to release it from the shift lever. Secondly, remove the gear lever surround trim during which it will be necessary to indicate the positions of Fixings for wiring connectors. Go for the removal of the steering column combination switch and boththe glove boxes. Then take out the panel positioned above the pedals: three screws, expanding plastic rivet, and plastic nut; disconnect the OBD socket and light wiring connectors. Detach the finish moulding strips on both sides of the shell of the instrument panel with a wooden or plastic scraper, to protect the face of the panel by placing cardboard on it. Subsequent to that, disconnect both of the instrument cluster assembly harness connectors then pull it out from the dashoard then, remove the heater control storage compartment lid to pull out the heater control from the dashboard. Six screws hold the storage compartment carrier - unscrew them with care for their positions, and if there are wired connectors on the carrier, this is the moment to disconnect them. Subsequently, remove both A-pillar trims, the light switch, the heaters control panel, the audio unit and the passenger airbag unit. On the passenger side there is a screw hidden in trim recess which has to be unscrewed, on the driver side than there is a air vent that can be pulled out by removing the retainers screws. Pop the hood and look at the far right side of the instrument panel, you will see a screw or an expanding plastic rivet, unscrew or pull it out. Disconnect the nut holding the in strawtery panel to the back of the gear lever and push back the front seats to be in a position to undo the instrument panel mounting nuts. With help, remove the instrument panel from the firewall, tearing off any center air vent cable, as well as other wiring connectors, if necessary. For installation reverse all above steps done while removing and in this way confirm that the instrument panel has to be fixed in right manner and all the wiring of control panel has to be fixed in right manner. Fit the remains of the instrument panel back into its place and tighten bolts, screws etc, replace the batteries and switch on all the electrical appliances and controls for confirmation that they are working as they should.
- Q: How to remove, inspect, and replace the front shock absorber on BMW Z4?A: Two new strut upper mounting nuts and a single strut-to-steering knuckle bolt fastener will be needed for the job. First free off the wheel bolts while placing the rear wheels chock, set the park brake, lift the front part of the vehicle and jack up on jackstands before removing the right wheel. To eliminate the situation when the lower arm assembly with removed strut will hang down, a wheel bolt should be inserted into the hub and the car body should be wired to it or the steering knuckle should be jacked. Pull down on the brake hose and detach the wiring harness from the clips on the bottom of the strut, then unbolt the nut and wash which attaches the stabilizer bar link to the strut, use a wrench to hold the bar link ball join in place while undoing the nut. Models with a ride height sensor-threads to remove the link bracket from the lower control arm, then remove the nut. Third, unscrew and pull out the nut which connects the suspension strut to the steering knuckle, then move the knuckle aside, this can be accompanied by the use of a large screw driver to pry the piece that holds the steering knuckle if those two cannot be pulled apart easily. From the engine compartment remove the top of the strut and next from under the wing and from the front of the car taking care to align the upper part with the lower one if there are no centering marks, turn the strut upper mounting nuts. With the strut removed clean the strut and then mount the strut vertically in a vice and place the Spring Compressor on the coil spring and compress the coil spring till no tension is applied on the spring. Take off the cap of the top of the strut to expose the upper mounting retaining nut to be loosened while holding the strut piston with some tool. Remove the mounting plate and with it the thrust bearing together with conical washer, flat washer, the upper spring plate, upper spring seat and the coil spring, the bump stop, boot and finally the lower spring seat. Inspect all parts for use and wear, and lubricate and inspect the upper mounting bearing . Check the strut for leakage; apply performance tests by compressing the piston fully and then briefly; if the resistance is giving jerky or an uneven feeling than replace it. In the eventuality where there are some concerns with the coil spring then it is recommended that the spring compressors be removed to look for signs of distortions or cracks as the case may be, and where these are found, then the coil spring needs to be changed. Check all the other components that may be adversely affected and replace them if they are questionable. Now replace the lower spring seat and the bump stop along with the boot to the strut piston; now place the coil spring in the right manner with the help of the right rubber seat in the spring. Place the upper spring seat, with the spring end positioned at the seat stop, followed by the flat washer, the conical washer - with the concave side up, and the upper mounting plate, finally, tighten the new nut of the mounting plate to the required torque. In case the damper rod turns as the nut is tightening, one may use a cut-away socket. Check that spring ends and seats are correctly positioned, and then liberate and unhook the compressor from the strut before fixing the cap in its place. Ensure some threads beneath the steering knuckle clamp for the strut are cleaned; by using a wire wheel if possible. Position the strut assembly in its proper place by the center of the pin or by the marks made earlier and fit the new upper mounting nuts. Identify the steering knuckle together with the suspension strut and then fit the retaining bolt and tighten to the specified torque, this bolt also holds the wiring or hose support bracket in place. Turn the strut upper mounting nuts to the required torque, and replace the suspension height sensor link bracket if present and fasten the nut. Screw the stabilizer bar connecting link into the strut; assure the correct positioning of this part against the lug on the strut; install the washer and new retaining nut and tighten it to the prescribed brilliance. Disconnect the hose/wiring and fold it back to the strut, then replace the wheel, lift up the car to the ground and fasten the bolts to the recommended torque limits.


